主要分以下几步:
- 本地创建Library工具类;
- 配置JitPack相关信息;
- 排查Library中错误并上传至GitHub;
- 创建release并在JitPack中编译;
- 在项目中引用
创建Library工具类
新建了一个新Android项目RandyJitPack,然后给改项目添加一个名为utils的Library Module,Library Module的包名为com.rainmonth.utils;
配置JitPack相关信息
在RandyJitPack项目的根目录的build.gradle文件中添加如下配置:
1 | // Top-level build file where you can add configuration options common to all sub-projects/modules. |
插件版本和gradle版本(gradle-wrapper.properties中的版本)对应关系速查
| 插件版本 | 所需的Gradle版本 | Dependencie版本 |
|---|---|---|
| 1.0.0-1.1.3 | 2.2.1-2.3 | com.github.dcendents:android-maven-gradle-plugin:1.2 |
| 1.2.0-1.3.1 | 2.2.1-2.9 | com.github.dcendents:android-maven-gradle-plugin:1.2 |
| 1.5.0 | 2.2.1-2.13 | com.github.dcendents:android-maven-gradle-plugin:1.2 |
| 2.0.0-2.1.2 | 2.10-2.13 | com.github.dcendents:android-maven-gradle-plugin:1.1 |
| 2.1.3-2.2.3 | 2.14.1+ | com.github.dcendents:android-maven-gradle-plugin:1.5.1 |
| 2.3.0+ | 3.3+ | com.github.dcendents:android-maven-gradle-plugin:1.5 |
| 3.0.0+ | 4.1+ | com.github.dcendents:android-maven-gradle-plugin:2.0 |
| 3.1.0+ | 4.4+ | com.github.dcendents:android-maven-gradle-plugin:2.0 |
| 3.2.0-3.2.1 | 4.6+ | com.github.dcendents:android-maven-gradle-plugin:2.1 |
| 3.3.0-3.3.2 | 4.10.1+ | com.github.dcendents:android-maven-gradle-plugin:2.1 |
| 3.4.0-3.4.1 | 5.1.1+ | com.github.dcendents:android-maven-gradle-plugin:2.1 |
| 3.5.0+ | 5.4.1-5.6.4 | com.github.dcendents:android-maven-gradle-plugin:2.1 |
注意上面的dependencies列的内容不一定准确,可以多试几次。
在utils这个mudule的build.gradle中,添加如下配置:
1 | // 应用maven插件 |
排查Library中错误并上传至GitHub
将项目中的utils module以及跟项目的配置文件上传至GitHub,如下图:
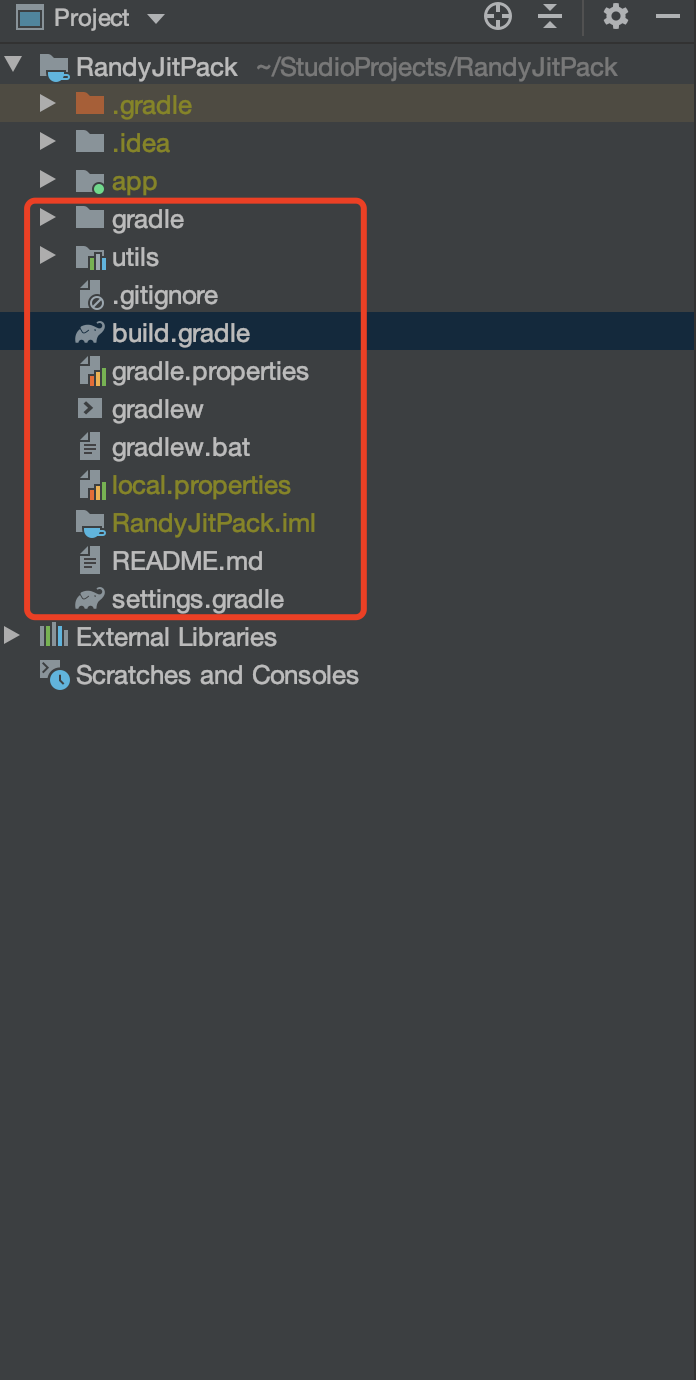
只需要上传红河框框里面的部分。(前提先要在自己的GitHub账户上创建一个响应的项目,如RandyJitPack,然后将上面截图部分提交至改地址,用一下命令:
1 | git remote add origin https://github.com/Rainmonth/RandyJitPack.git |
创建release并在JitPack中编译
创建release
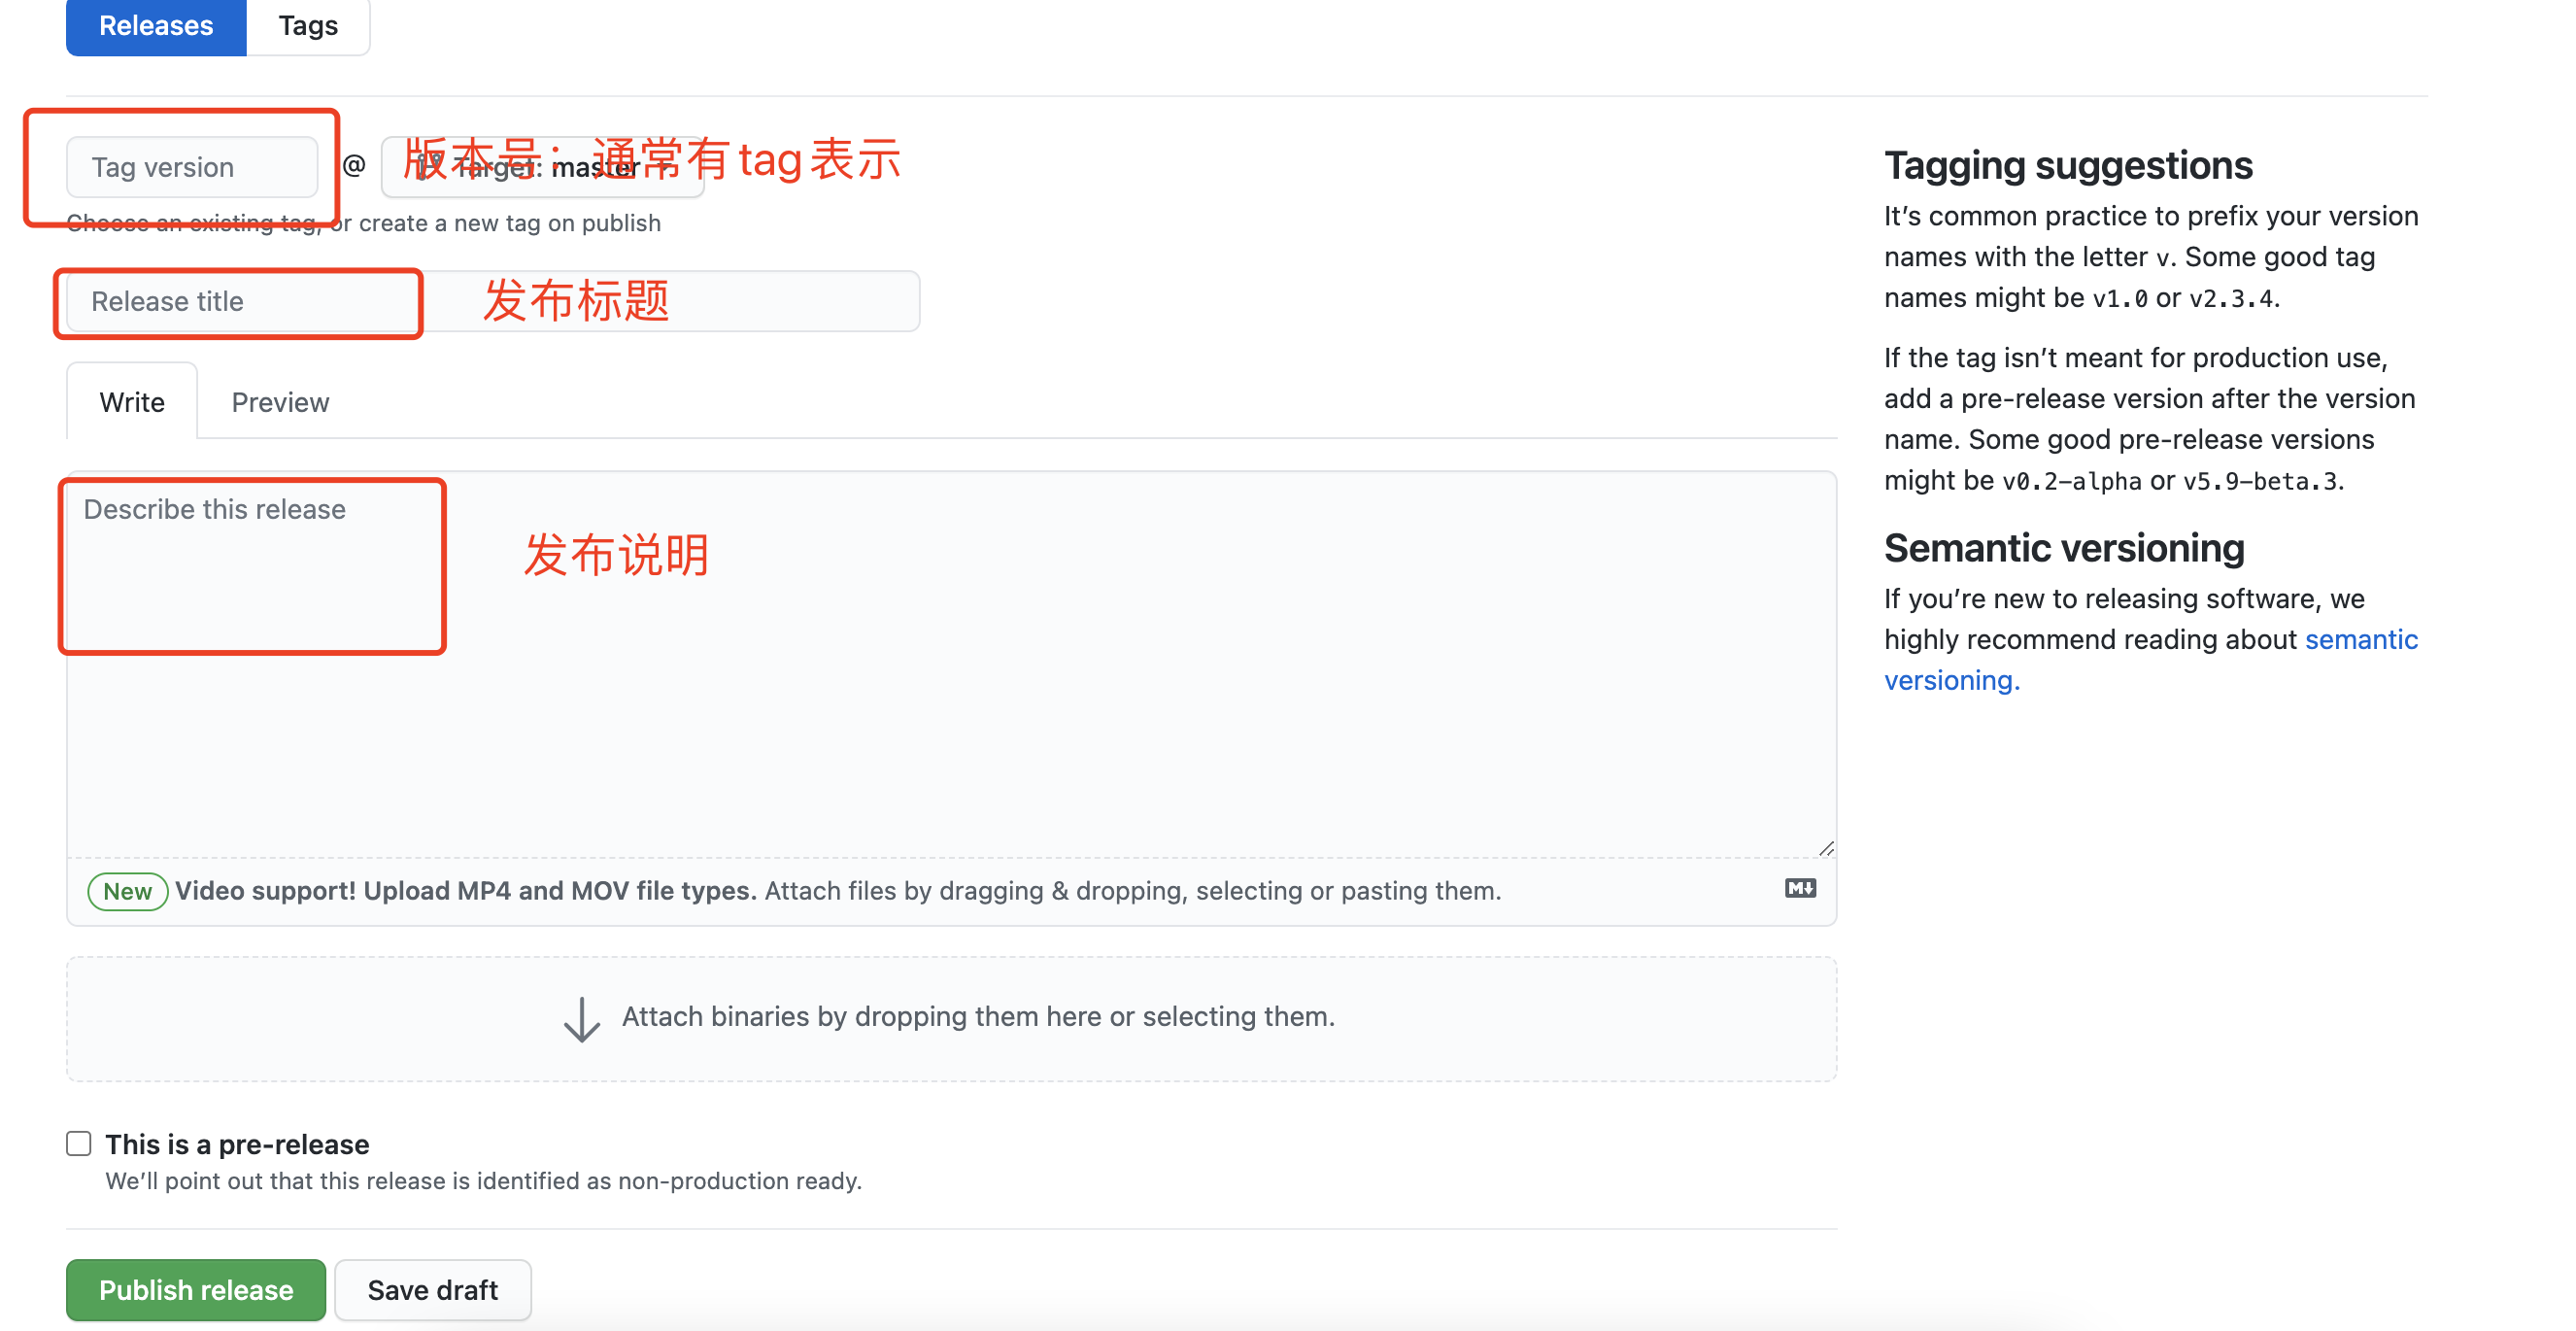
在RandyJitPack的项目主页,找到release,点击,就可以看到create a new release(之前没有创建过release)或着Draft a new relase(之前创建过)按钮,点击即可完成release的创建,如下图:
JitPack中编译
信息录入号后,点击Publish release即可将项目发布到https://jitpack.io。这个时候我们复制我们项目的地址,然后在https://jitpack.io中查找,即可看到下图所示的界面
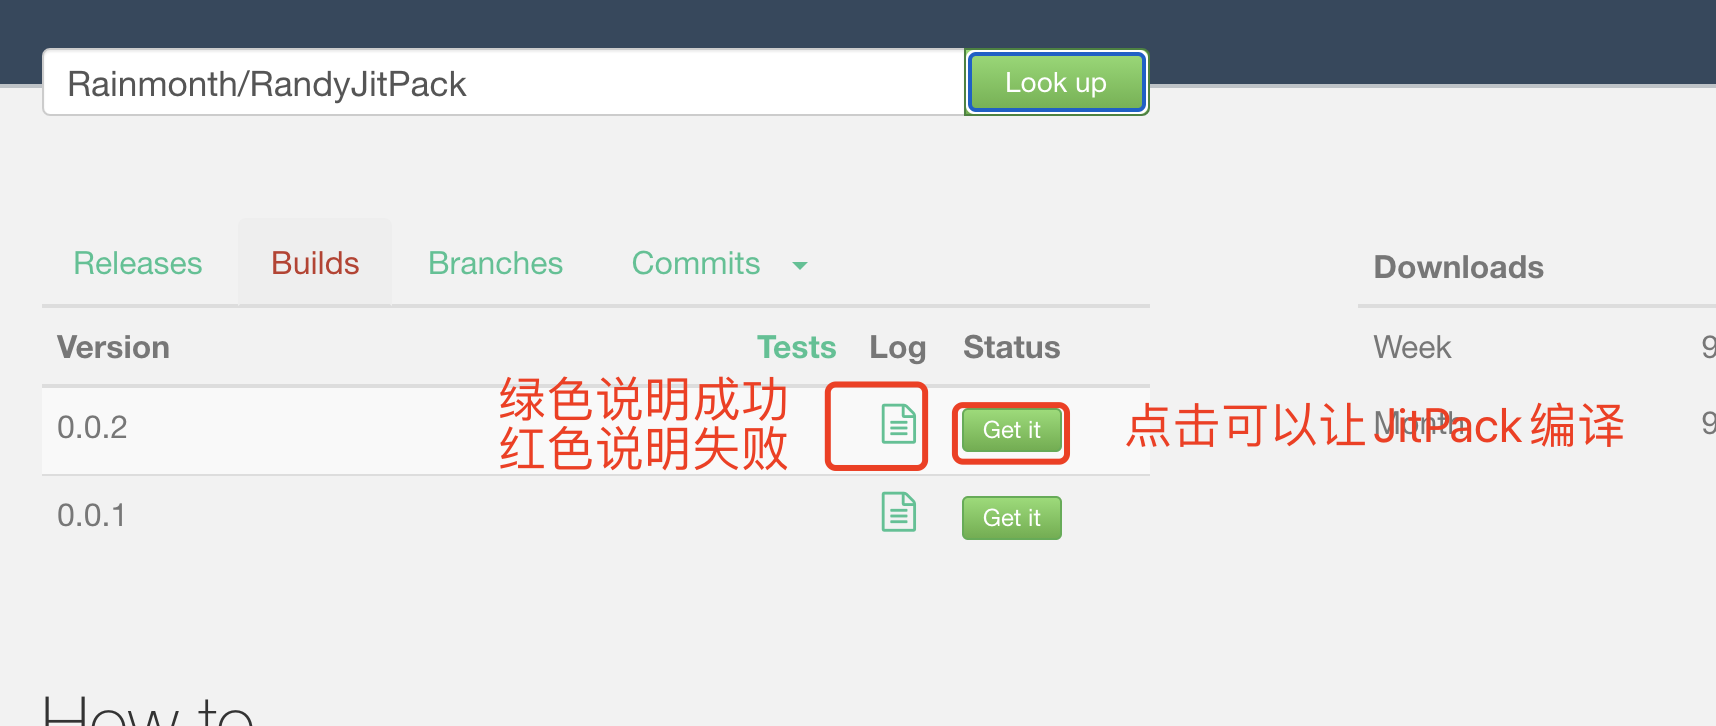
看到后,点击Get it:
- 如果log为红色的,说明编译失败了,可以点击log查看失败的原因
- 如果是绿色的,说明成功的,可以通过项目名称 + tab号来引用该项目;
在项目中引用
还是在jitpack.io中搜到的项目那个页面,在编译成功后,下面会有如下所示的一段引用代码,将其加入到要引用的项目的build.gradle文件的dependencies中即可完成引用,代码如下:
Root project下的build.gradle添加如下代码:
1 | allprojects { |
要应用的module的build.gradle中添加如下代码:
1 | dependencies { |
通过以上几个步骤,我们就完成了在线库的发布,是不是很容易!